Edit an Agent
You can edit the selected agent directly on the Agents page.
Open the editor
Go to the dashboard and use the Agent switcher in the header to pick the agent you want to change.
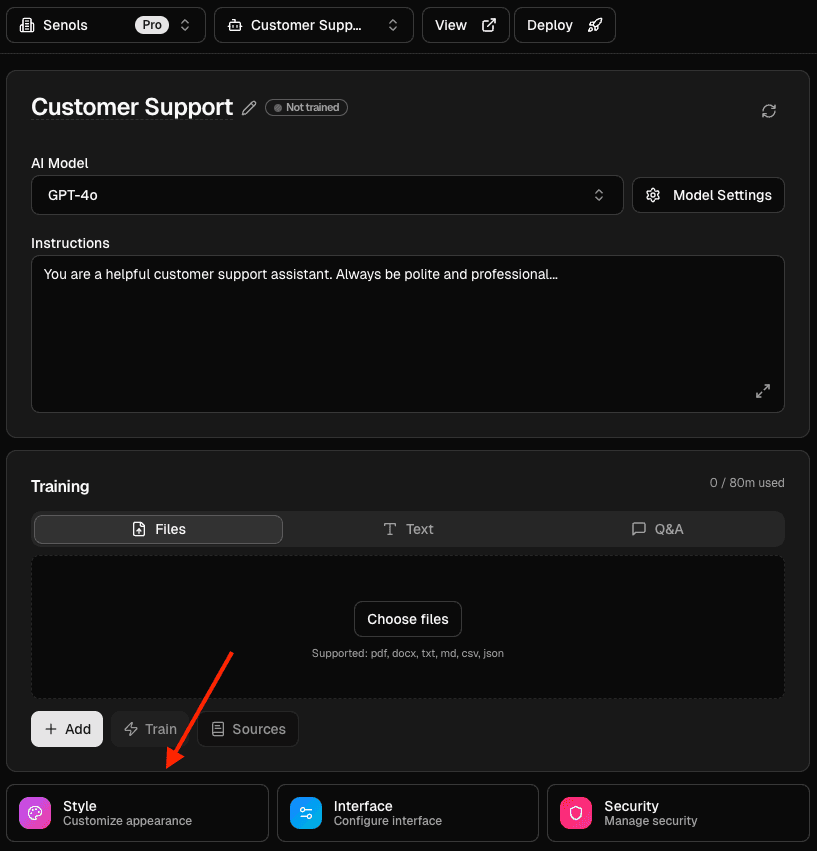
Edit the basics
- System prompt: write or adjust the instruction text the agent should follow.
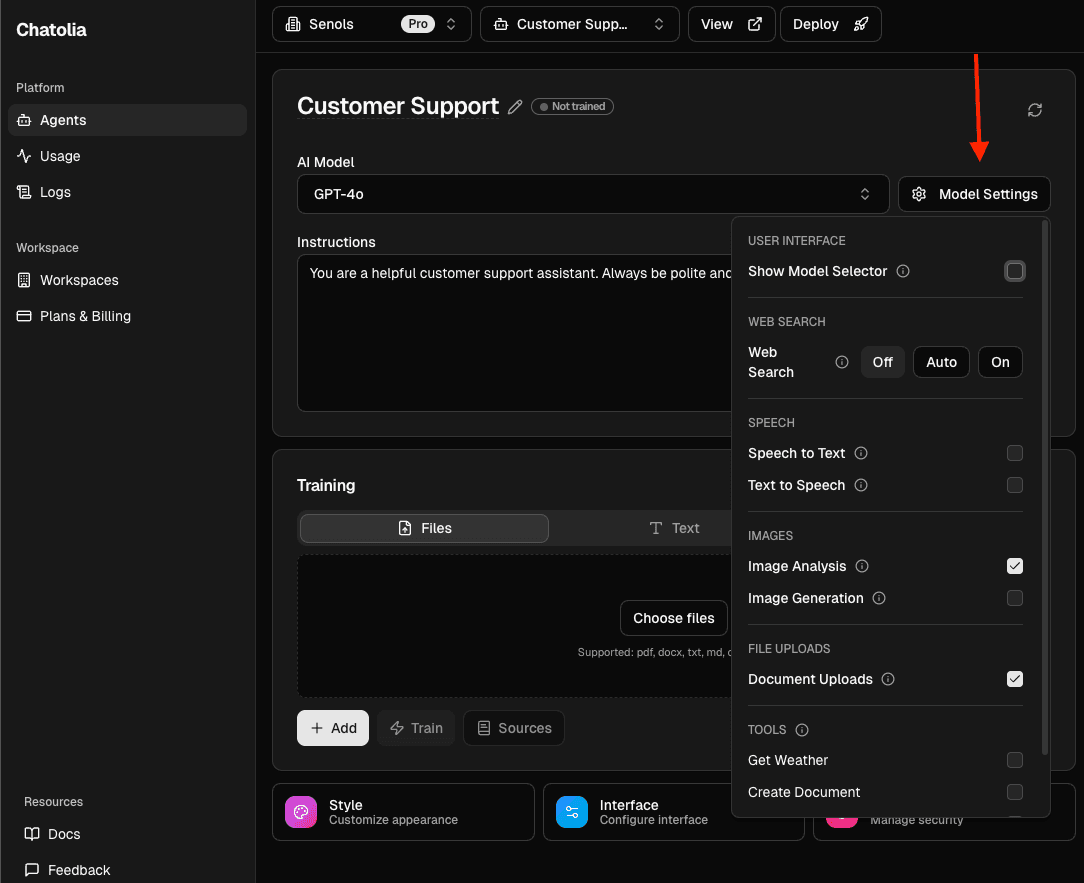
- Model: choose a chat model from the “AI Model” dropdown.
- Model Settings: open “Model Settings” to configure Speech, Web Search, Images, file/image uploads, and whether end users can switch models in chat.
Style and widget
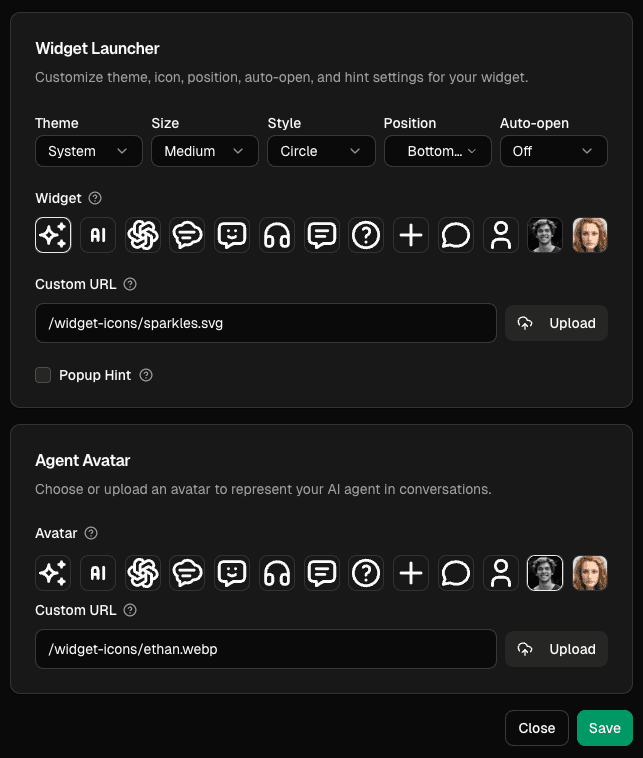
Open “Theme & Style” to control the look and feel:
- Theme: System, Light, or Dark.
- Avatar: set an image URL for the agent.
- Widget: set icon URL, icon shape, launcher size, and corner position.
- Popup Hint: set optional hint text and timing.
- Click Save when you are done.
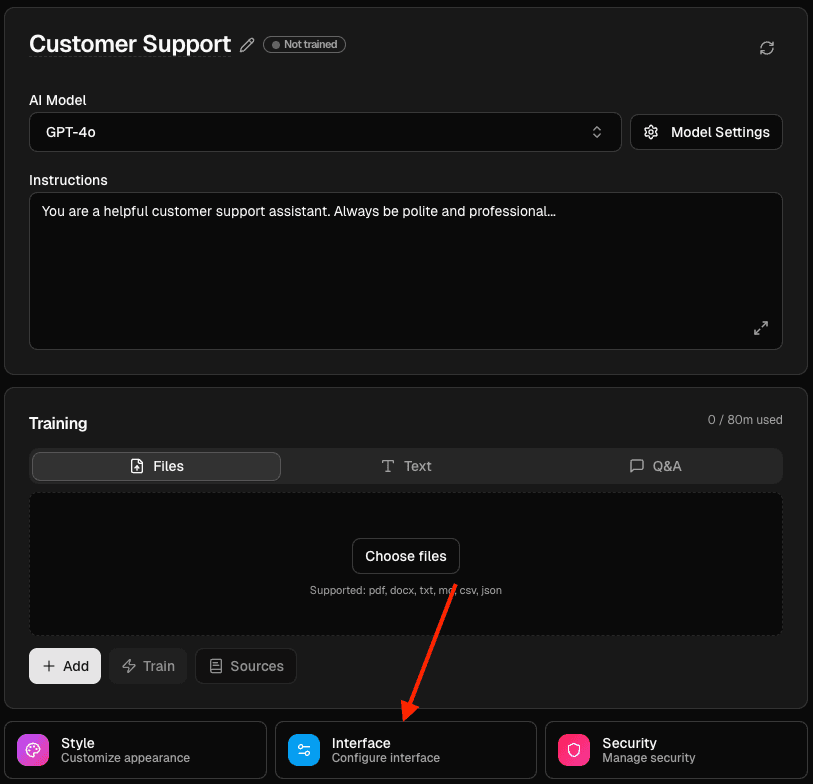
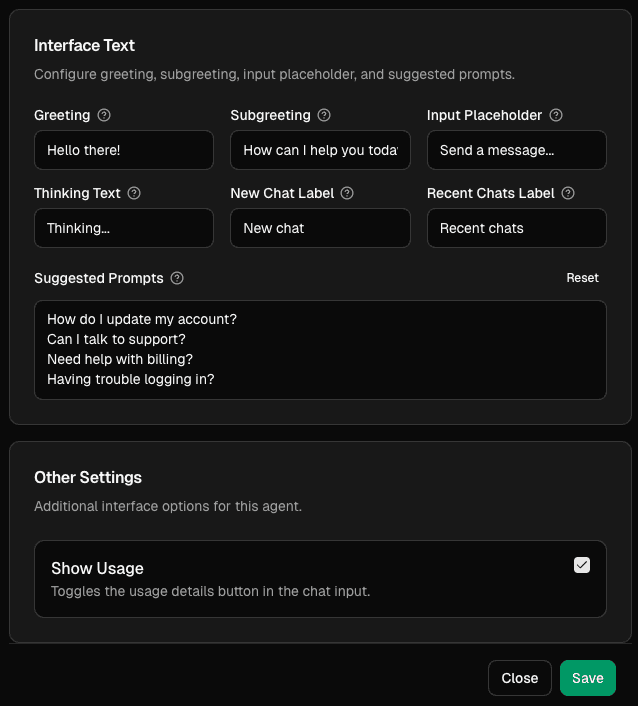
Interface
Open “Interface” to customize the text displayed in your agent’s chat interface:
- Greeting: The main welcome message (e.g., “Hello there!”)
- Subgreeting: Secondary greeting text (e.g., “How can I help you today?”)
- Input Placeholder: Placeholder text for the message input (e.g., “Send a message…”)
- Thinking Text: Message shown while the agent processes a response (e.g., “Thinking…”)
- New Chat Label: Label for starting a new conversation (e.g., “New chat”)
- Recent Chats Label: Label for the chat history section (e.g., “Recent chats”)
- Suggested Prompts: Add up to 4 suggested questions or prompts that users can click to start a conversation (e.g., “How do I update my account?”, “Can I talk to support?”, “Need help with billing?”, “Having trouble logging in?”)
- Show Usage: Toggle to show/hide the usage details button in the chat input
Click Save when you are done.
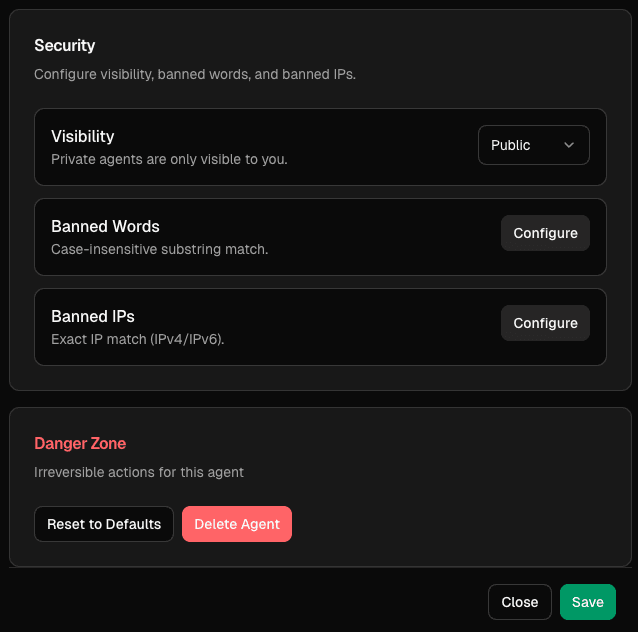
Security
Open “Security” to adjust who can access the agent and basic protections:
- Visibility: Public or Private.
- Banned words and IPs.
- Reset to defaults or delete the agent.

Saving changes
Model changes save automatically. Style, Settings, and Security panels have a Save button.
Last updated on